Shopify is an e-commerce platform that allows anyone to easily sell their products online, which is designed for small and medium-sized businesses.
SAP ECC stands for SAP ERP Central Component (ECC) and is an ERP system which consists of fully integrated modules that means when there is an update in one area of the business, such as sales, information automatically updates in other relevant areas of the business, such as inventory.
APPSeCONNECT is a smart and robust Integration Platform as a Service (iPaaS) which seamlessly integrates e-commerce (Shopify, Magento) with ERP systems (SAP ECC, SAP B1) and automates your business processes.
In this article, we will see the complete process to integrate Shopify with SAP ECC using APPSeCONNECT. Following points will be discussed in this article.
- How to connect Shopify with APPSeCONNECT agent.
- How to connect SAP ECC with APPSeCONNECT agent.
- Sync process from SAP ECC to Shopify direction such as products.
- Sync process from Shopify to SAP ECC direction such as orders.
How To Connect Shopify With APPSeCONNECT Agent?
Below are the pre-requisites to connect with Shopify using APPSeCONNECT Agent.
Step 1 – Shopify Account
- Create an account in Shopify: https://accounts.shopify.com
- Enter the fields like email address, First name, last name, and password.
- Click on Create account.
Step 2 – Store Creation
- Create a store click on create store button (Which is shown in the below screenshot)
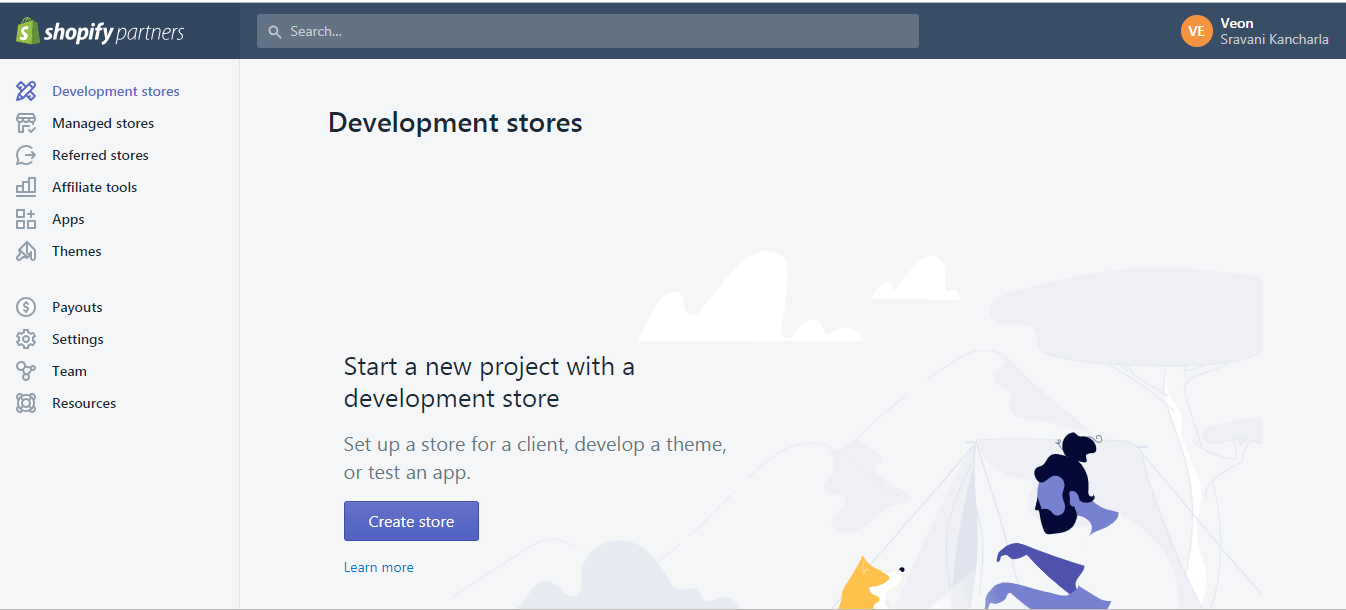
- Enter your store name which is unique, and it will be a store domain for accessing.
- Provide the Shopify account credentials (which are shown in the below screenshot).
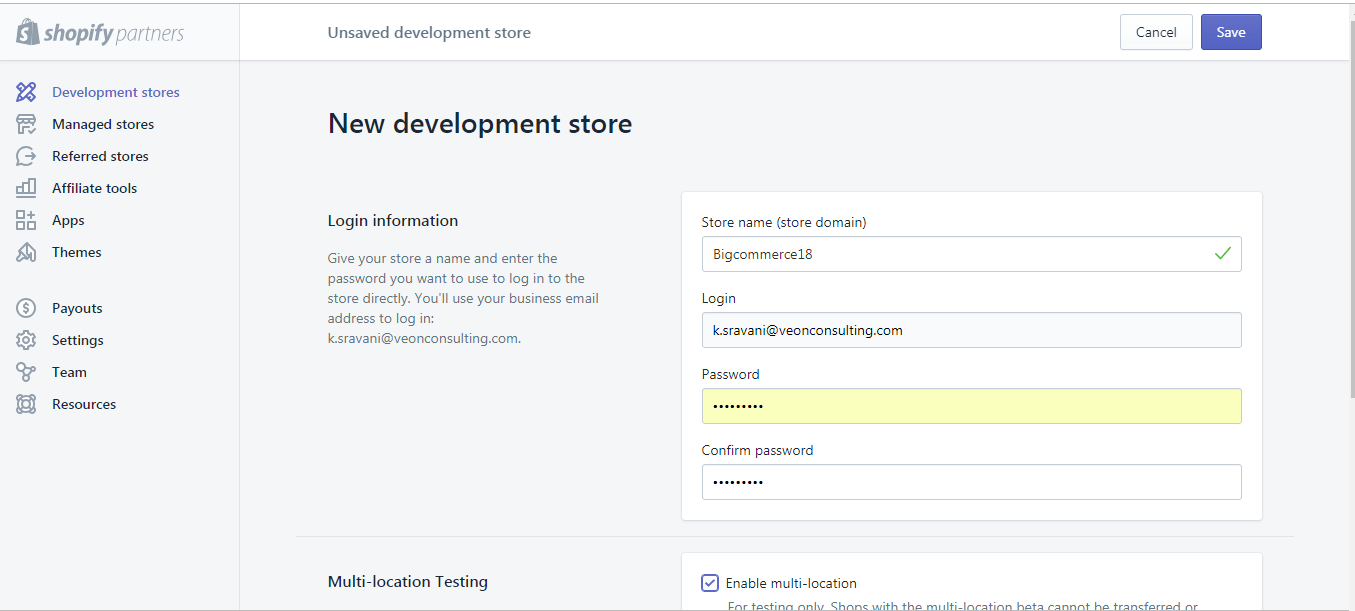
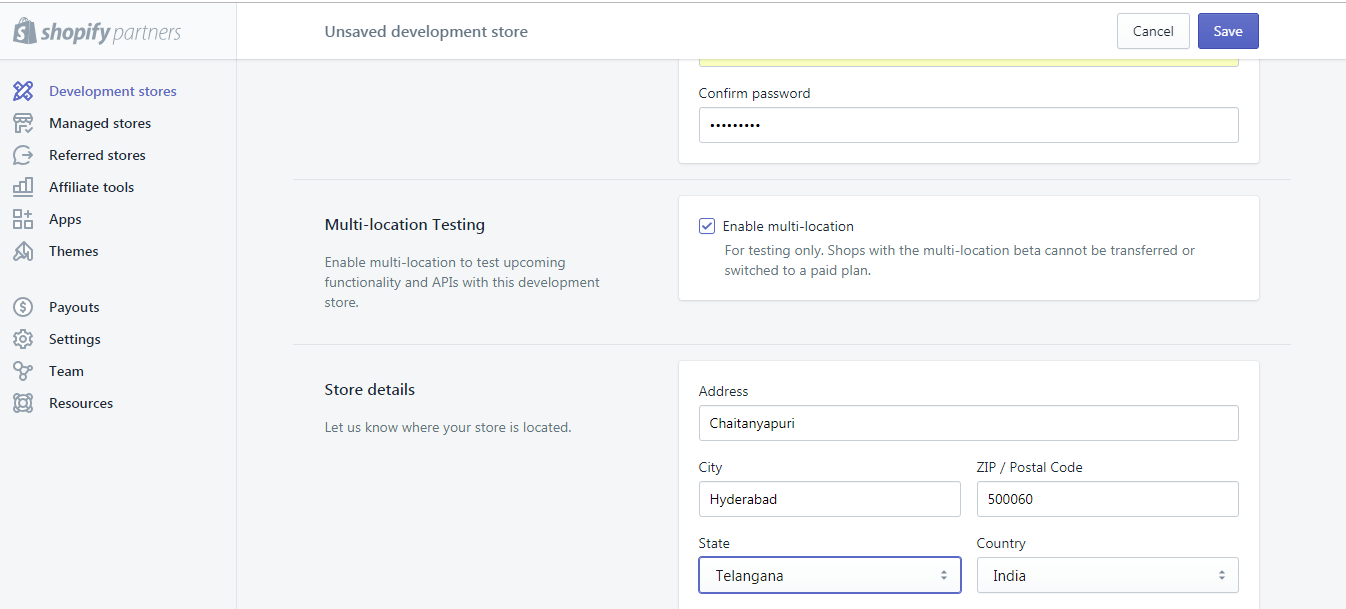
- Provide your store address and click on Save.
- The following pop will be displayed once your store is successfully created.

To connect Shopify using API from the outside we require the one app. We can create an app in Shopify which is shown below.
Step 3 – App Creation in Shopify Account:
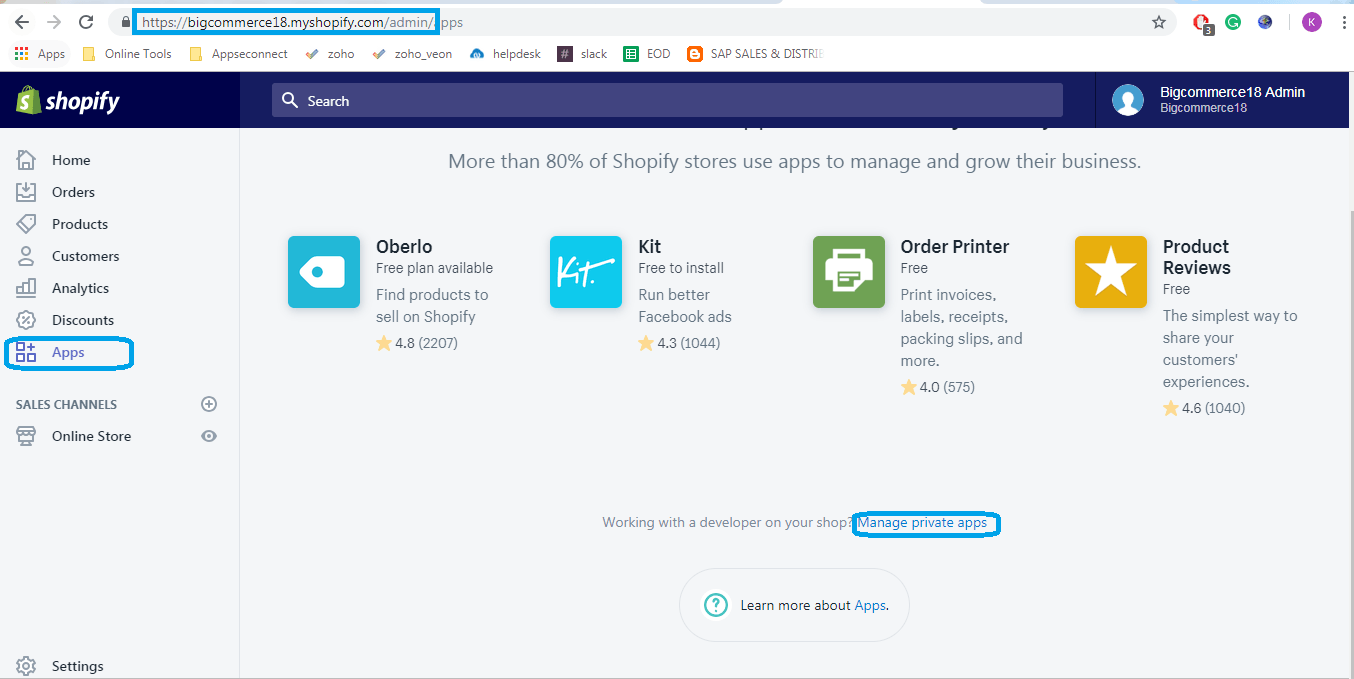
- To create an app click on Apps –> Manage private Apps(which is shown in the below screenshot)
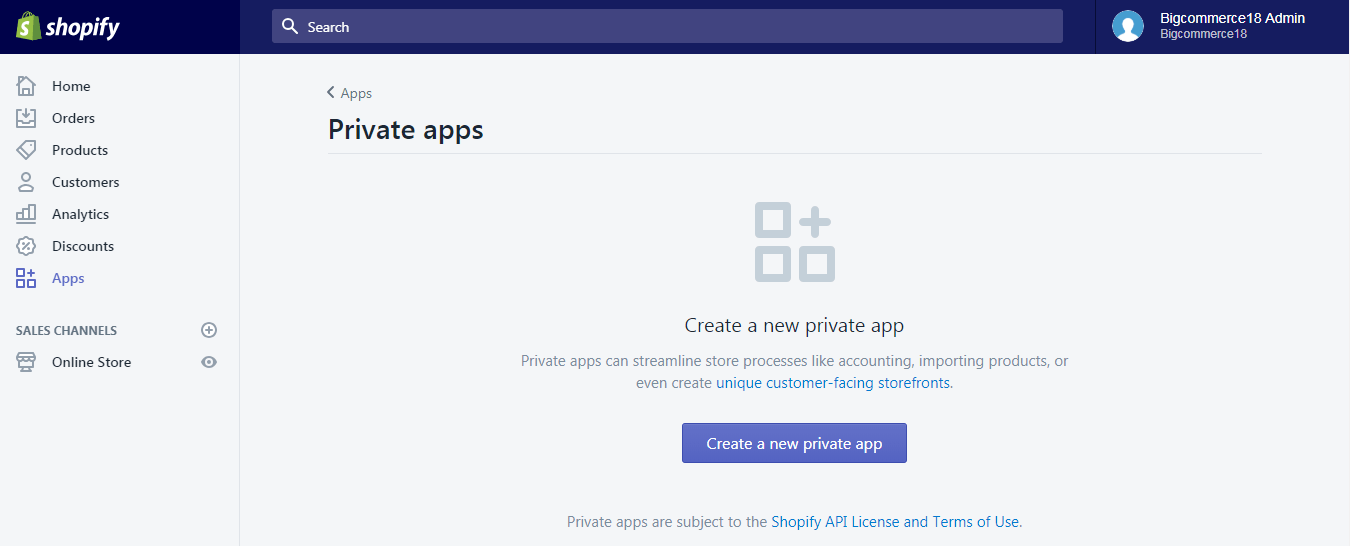
- Click on Create a new private app.
- Enter app name which is relevant to your business and provides the email id for contact.
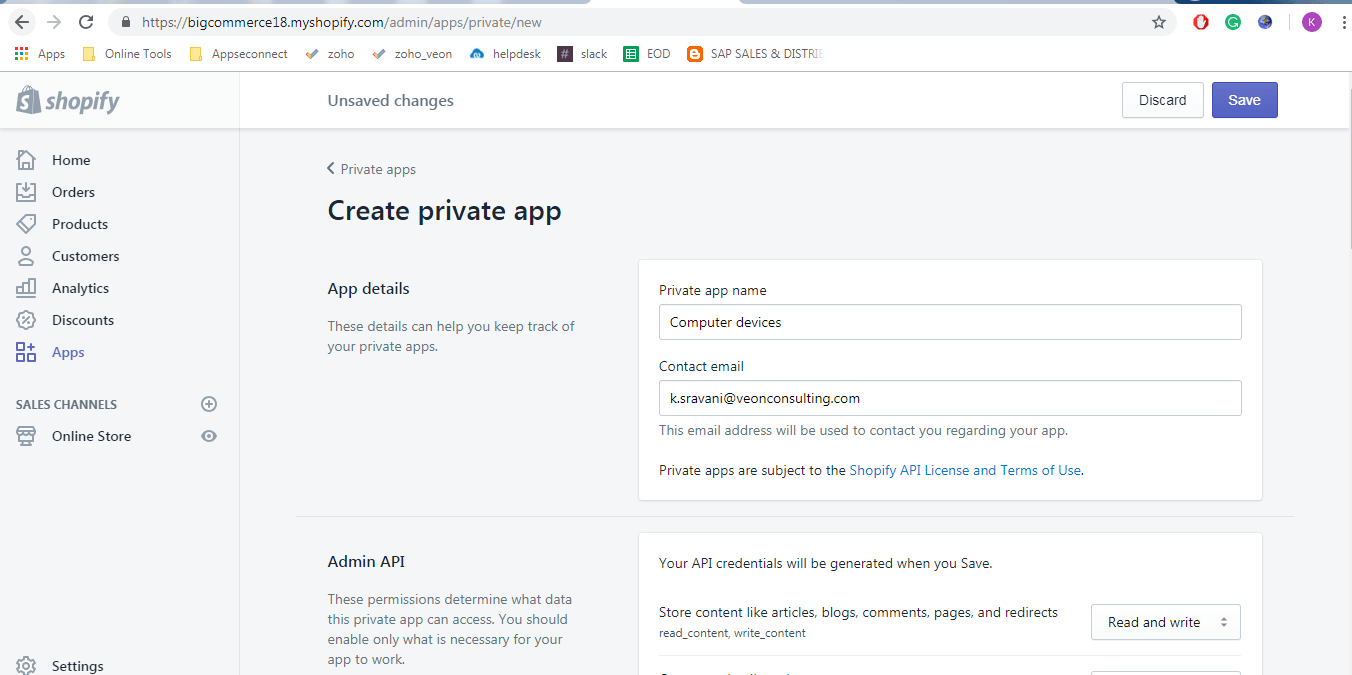
- Select the checkbox “Allow this app to access your storefront data using storefront API” Which will allow you to read and write the data using this App (Which is shown in the below screenshot).
- Click on Save
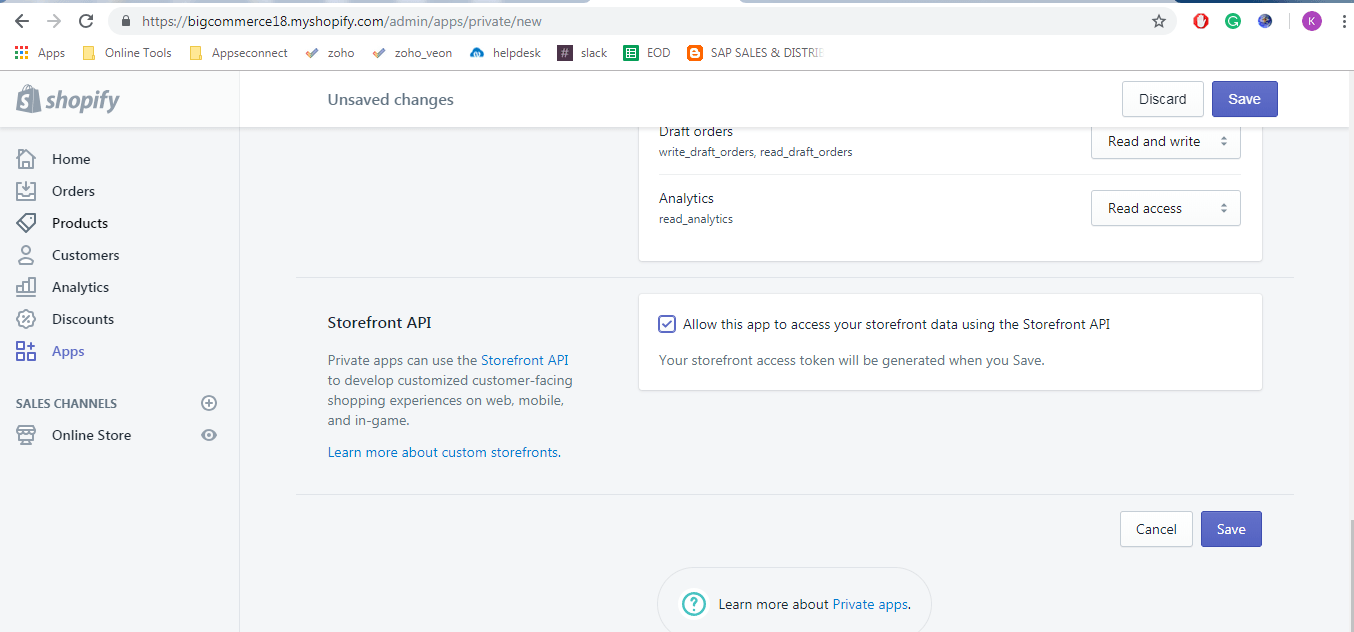
- Now the app has been successfully created.
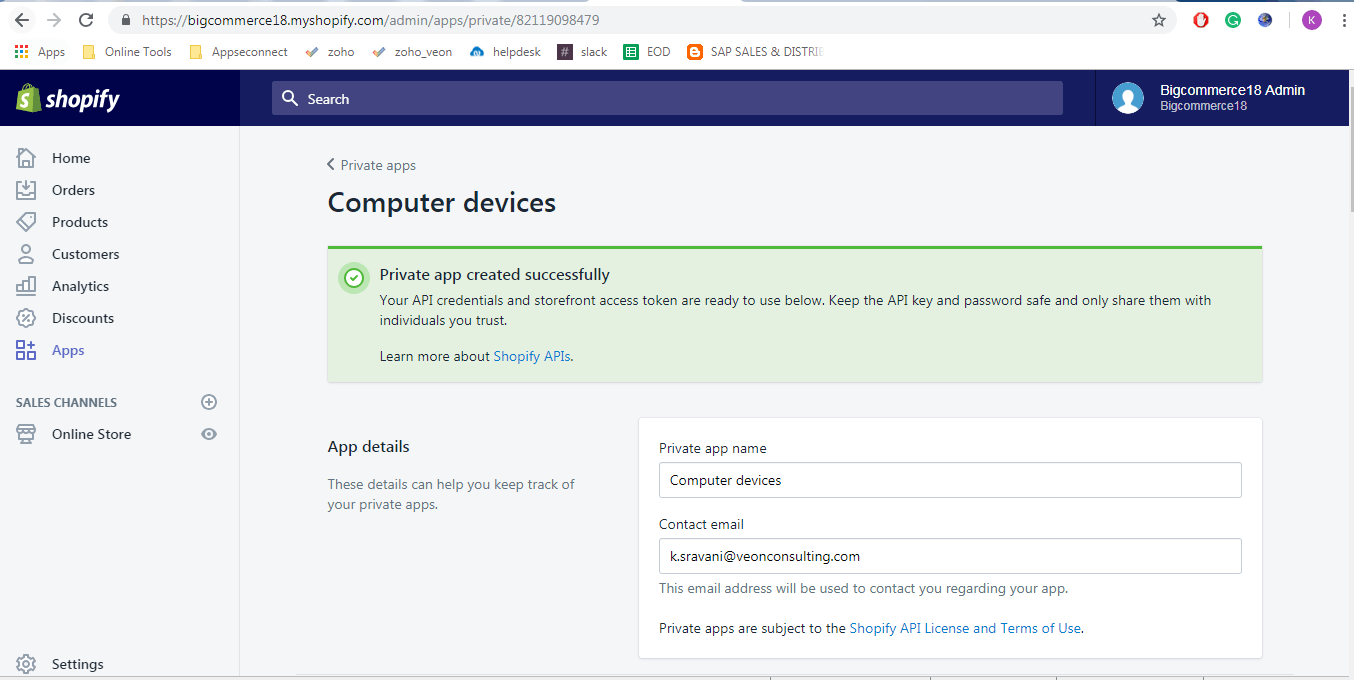
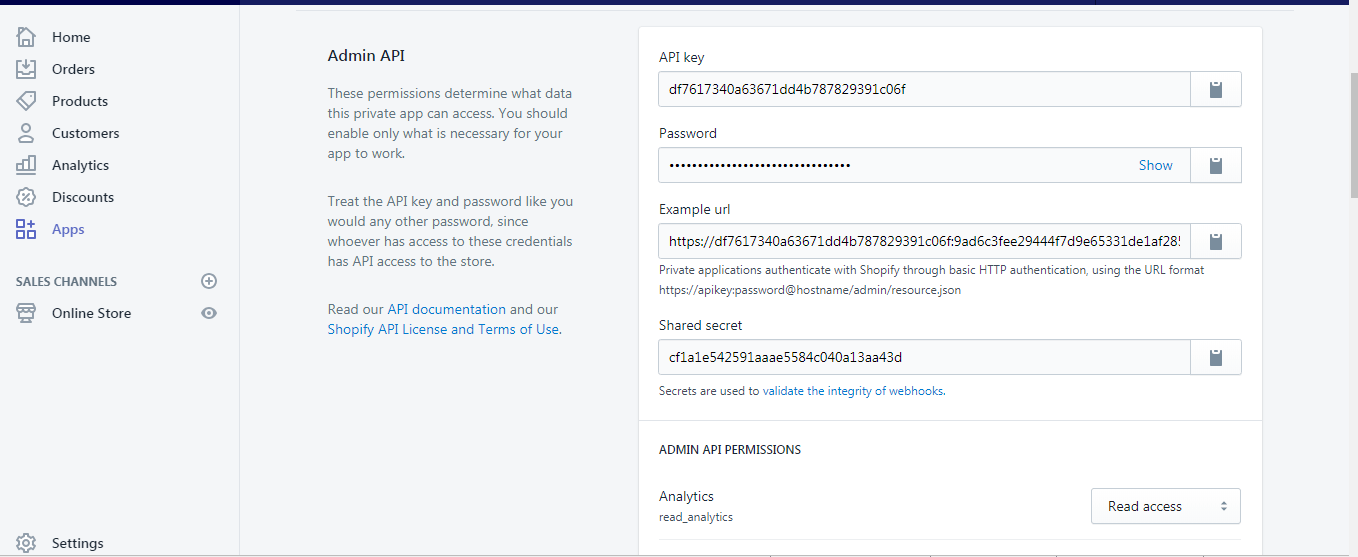
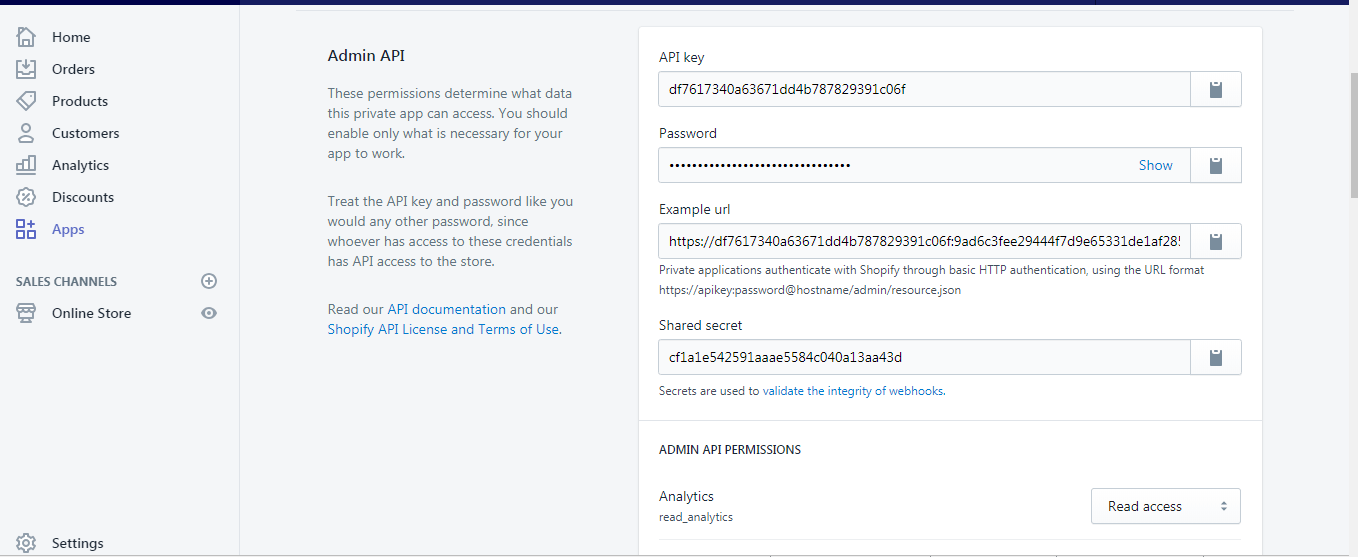
- After the app is successfully created API key, password, Example URL, Shared secret, Storefront access token for that app are generated automatically.
- These are unique for each store. By using these we can connect our Shopify store securely.
Step 4 – Connecting Shopify with APPSeCONNECT Agent:
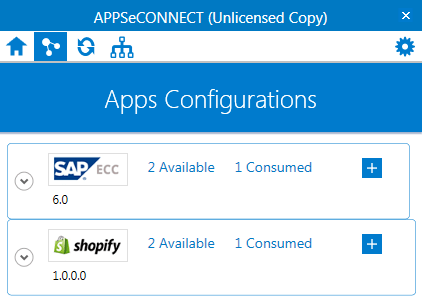
- In APPSeCONNECT Agent, we have developed Apps which will take credentials to connect to respect App. In the below fig. we can see SAP ECC and Shopify Apps.
- To provide the credentials Click on + symbol.
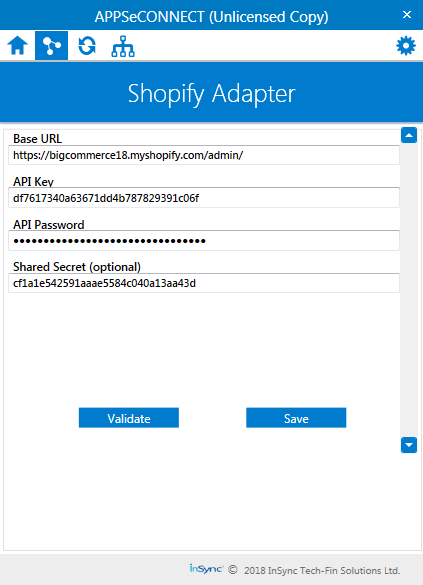
For connecting with Shopify which will require following details.
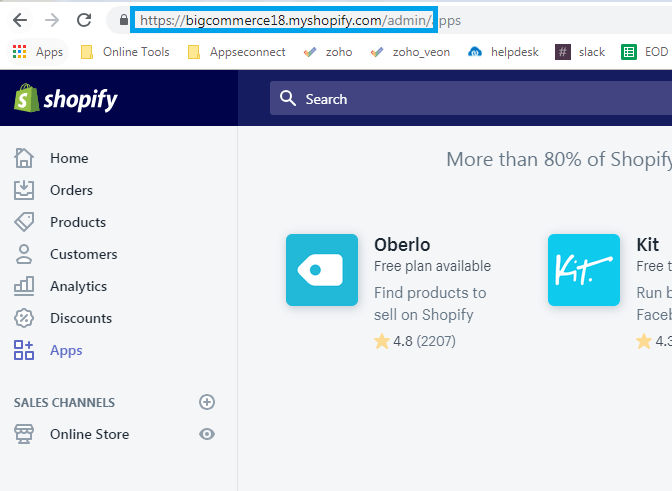
- Base URL: This will be your store domain (which is shown in the below screenshot).
- API key, API password, and Shared secret: These are private app details.
- After providing the credentials, click on Validate. It will validate the credentials using Basic authentication via API.
- After successful validation, It will display the below message which is shown in the below screenshot.
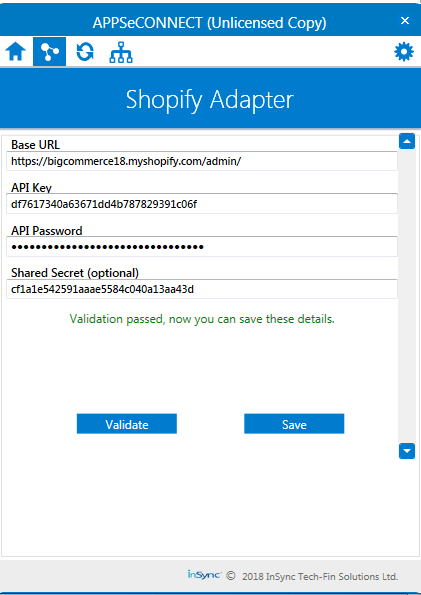
- Click on save button to save the credentials.
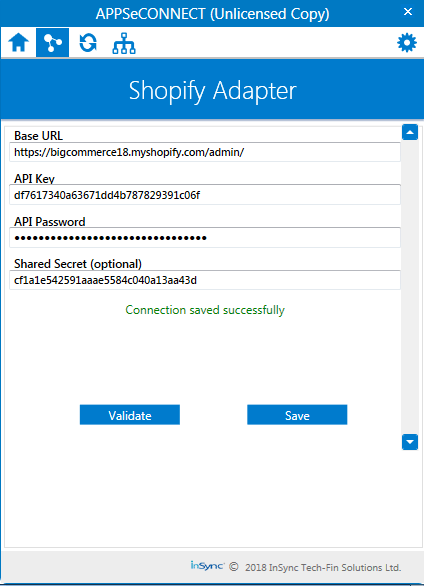
How To Connect SAP ERP With APPSeCONNECT Agent?
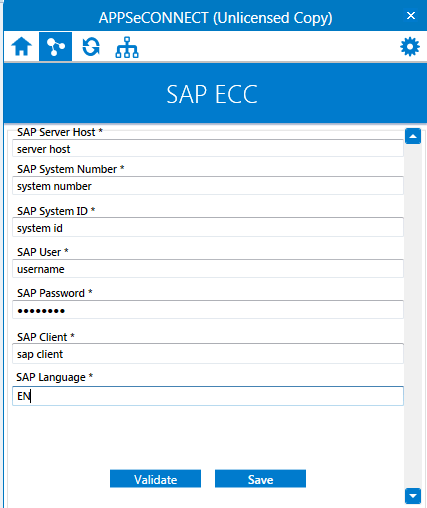
- Click on the + button within the SAP ECC to provide and validate the credentials of SAP within the Agent.
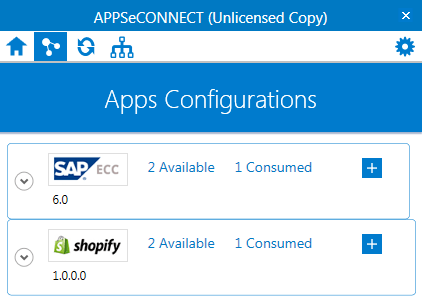
- Enter all SAP credentials such as SAP server host, system number, system id, username, password, client, and language.
- Click on validate and save the credentials
Sync Process From SAP ERP To Shopify Direction:
The data synchronization is bidirectional. SAP ECC to Shopify and Shopify to SAP ECC. We are syncing the data using the Touchpoints. Each touch point will do the specific operation.
In the below screenshot, there are few touch points for Product Add, Customer Add, Delivery, and invoice sync in the agent. These data will sync on the real-time basis using the IDOCS. When Idoc’s are triggered from SAP then these data will sync to Shopify.
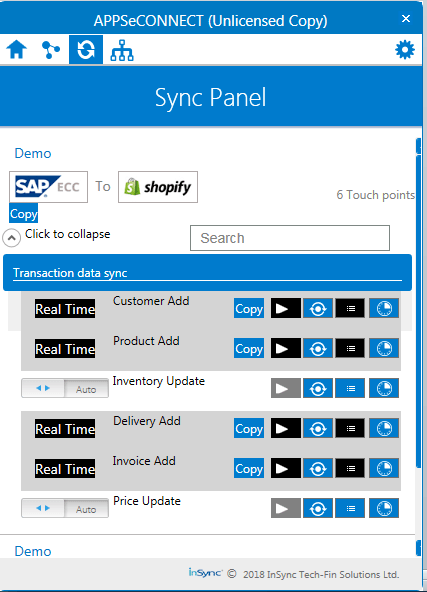
- Let’s sync the products from SAP ECC to Shopify using Product Add touch point.
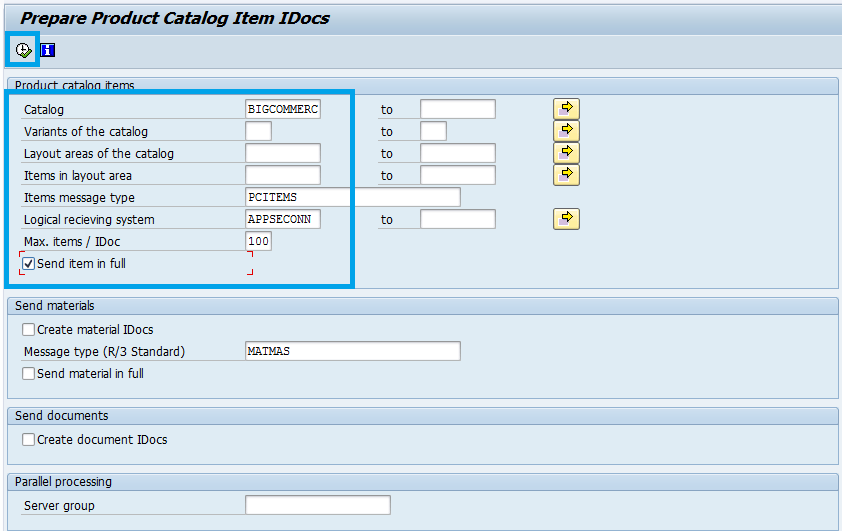
- To send the Product Idoc use the tcode WPC2. Select the Logical System of APPSeCONNECT(Which is configured for reaching the IDOCS to the AGENT).
- The Agent will process the IDOC using Product touch point and sync the product information to Shopify by hitting the product API in Shopify.
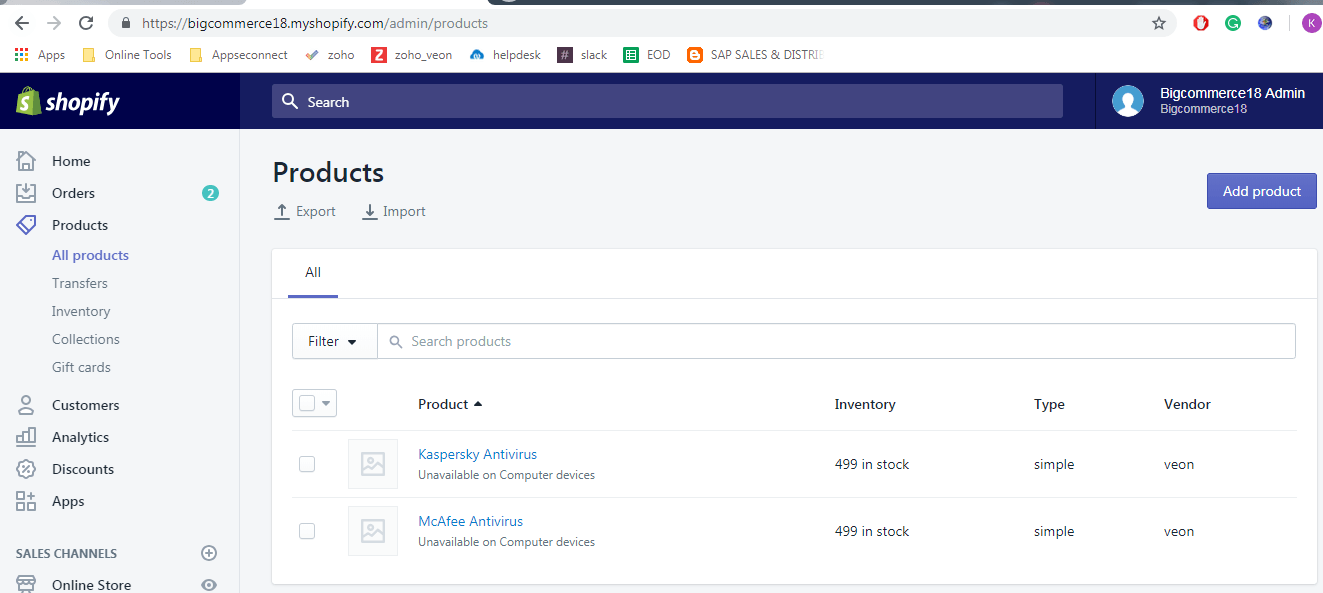
- The products have been successfully synced to Shopify.
- In this way, we can also sync customers, delivery and invoices which are synced from SAP ECC to Shopify direction.
Sync Process From Shopify To SAP ERP:
- Basically, we require the orders data to Sync with SAP. By using the Orders API, Agent will fetch the orders data and sync to SAP.
- Create an order in Shopify. The order can be synced by the orders touch point based on time interval in APPSeCONNECT Agent.
- Order is created in Shopify which is shown in the below screenshot.
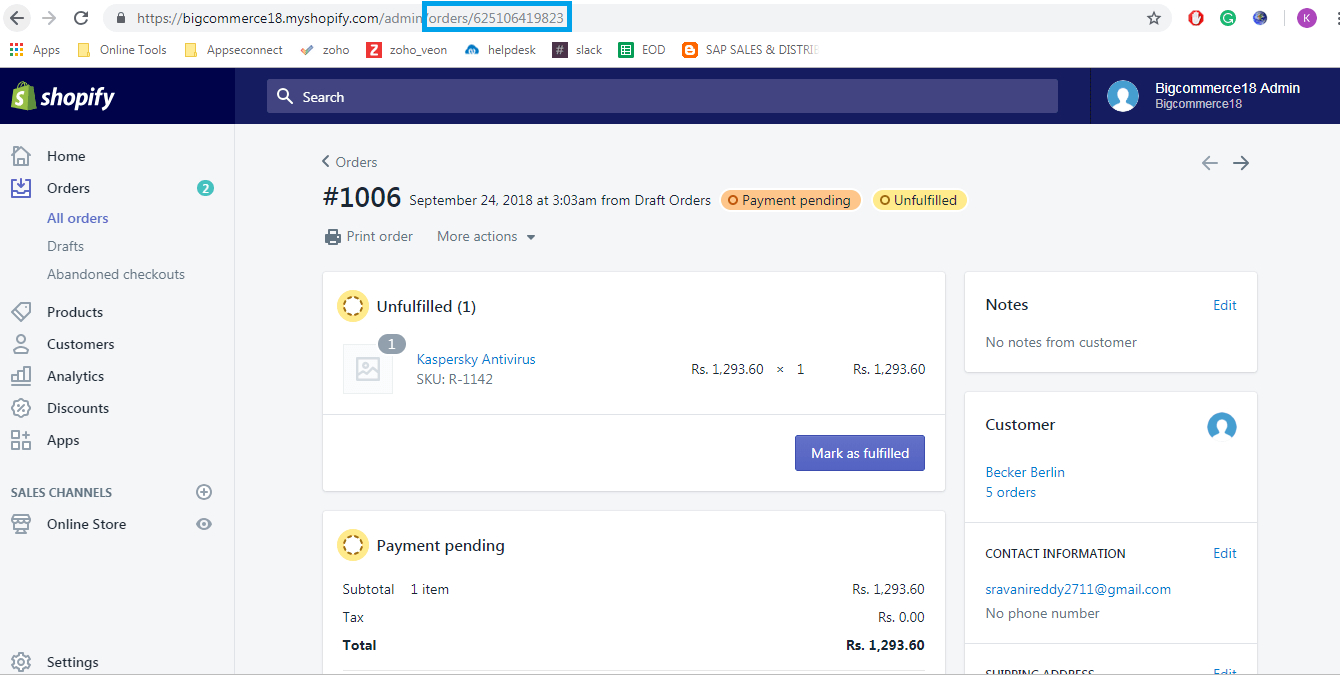
- In the below screen, there is an order touchpoint with a specified time interval syncs orders from Shopify to SAP ECC.
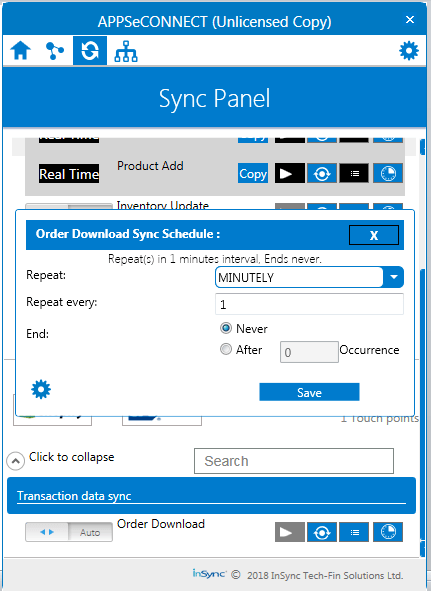
- The above order download touch point fetches the orders from Shopify for every 1 minute and syncs the orders to SAP ECC.
- We can see the order’s details in the AGENT which is synced and which is failed by Clicking on the resync bucket.
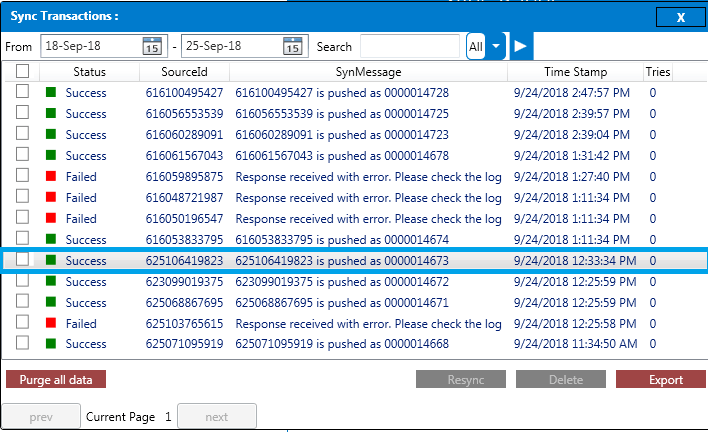
- Check this order in SAP using Tcode VA03.
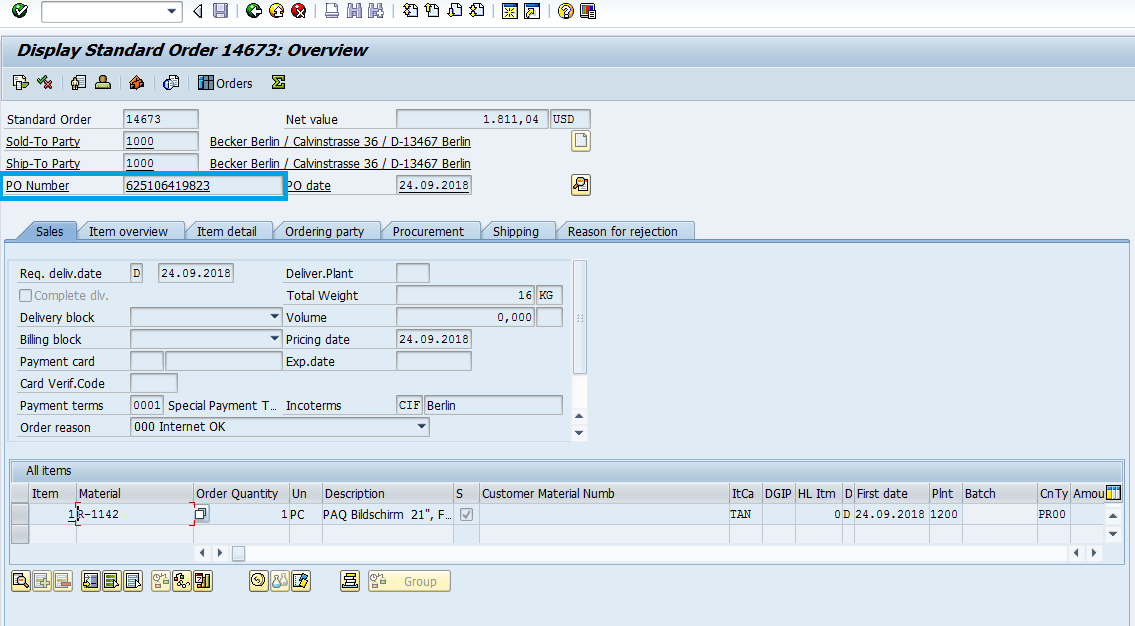
- The order has been successfully synced into SAP ECC.
The following video demonstrates the integration process between Shopify and SAP ECC.
Conclusion:
By following the above steps, you can successfully integrate Shopify with SAP ECC. We sincerely hope that this was useful and any comment of feedback will be very helpful.
Now, you can easily integrate your SAP ERP System and Shopify store to automate the business process!
You may also like:
How to Automate Your Shopify Store Easily
Top 10 Features You Get When You Upgrade To Shopify Plus
Indirect Access For SAP Business One – Updates and Changes

