Microsoft Outlook, from the Microsoft umbrella is one of the most sought after Personal Information Manager, primarily as an email application along with the other features like calendar, task manager, contact manager, note taking, journal, and web browsing. Being an aggressive player in the free email account market, Microsoft Outlook has also been a favorite for enterprises, all scaling from small to large.
However, with the ever thriving CRM industry nurtured by customer-responsive approach of the organizations today, using a CRM tool alongside a Personal Information Manager as effective as Microsoft Outlook is although indispensable yet using them on separate platforms makes the entire process clumsy and a time-consuming affair. The optimality of a CRM tool engaging a sizable investment of a company is disrupted, which is again undesirable.
An integration of both the distinct platforms to create a common set of information for a common prospect which shall be available instantly to be worked upon should be the choicest way. But, is it possible?
The category leader in the era of CRM movement, Salesforce.com has once again proved why they are the best breed in sales force automation (SFA) when they came up with the solution in their Dreamforce Conference, 2015 in the form of a strategic partnership between Salesforce.com and Microsoft to connect Salesforce CRM to Microsoft Office apps and services.
Thus, welcome Salesforce APP for Outlook.
Let us have a quick look at how Salesforce.com planned Microsoft Outlook for its users in a step-by-step manner.
To begin with, you will need one registered Salesforce.com Account along with a Microsoft Office Outlook desktop.
Step 1: Close all your Microsoft Office related Apps on your desktop/laptop
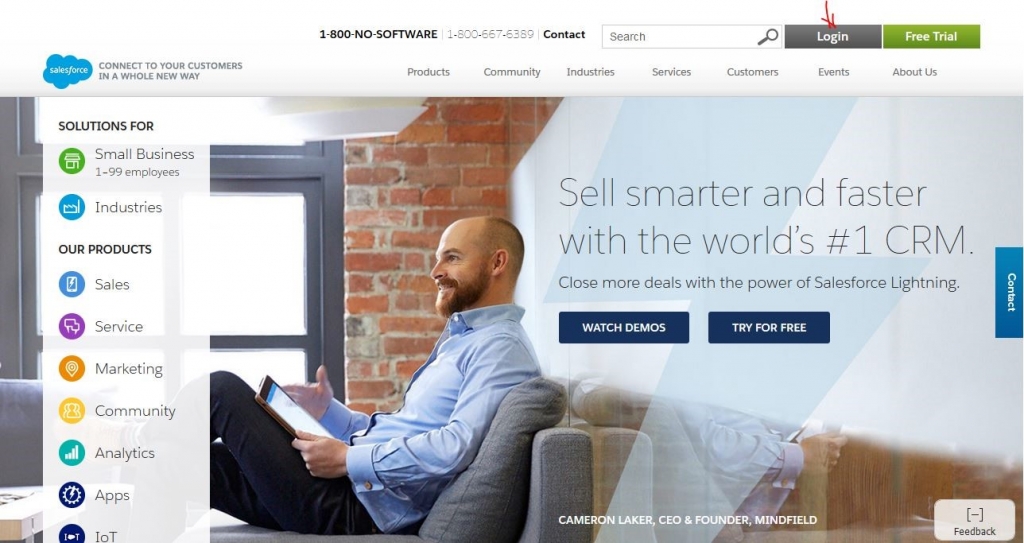
Step 2: Log in to your Salesforce.com account using your login credentials
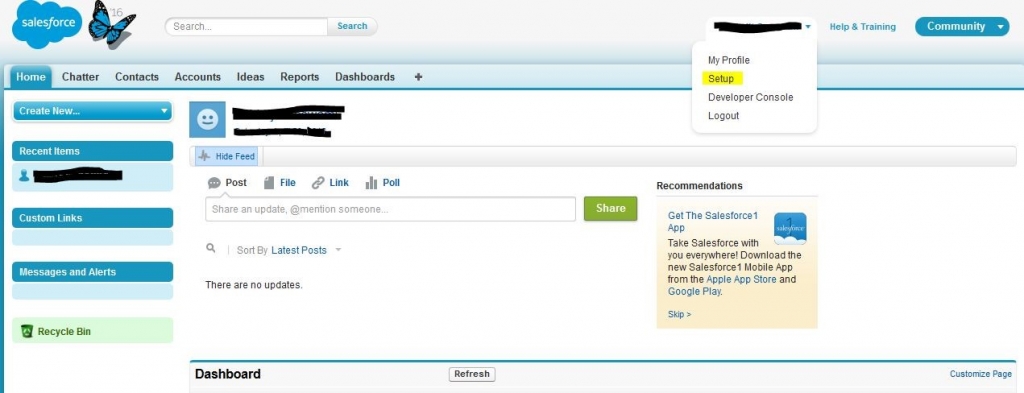
Step 3: Go to your Home page -> Personal Information (Your Name and its drop down list) -> Setup
Step 4: After clicking on “Setup” a new page will open up. On the Left side of the page there will be a long list of clickable options under “Personal Setup” Tab such as below:
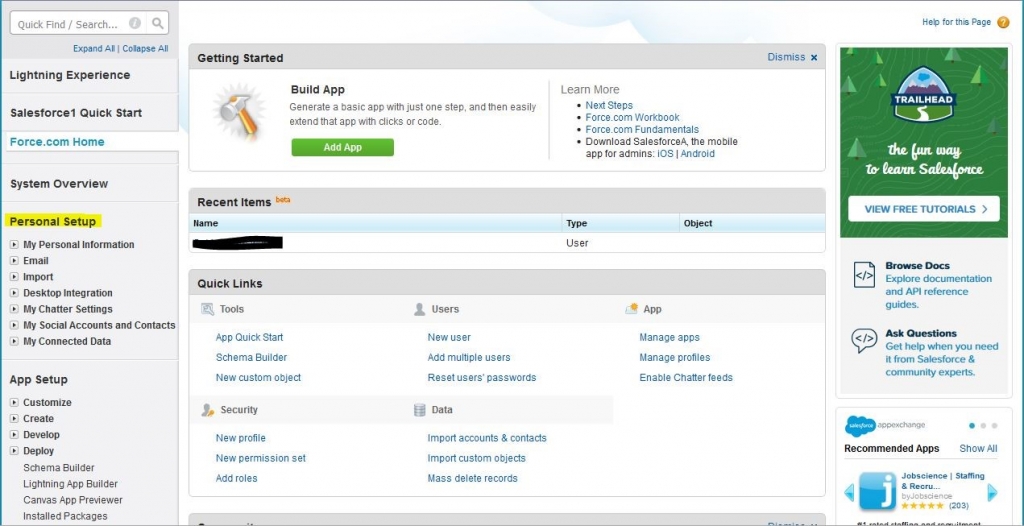
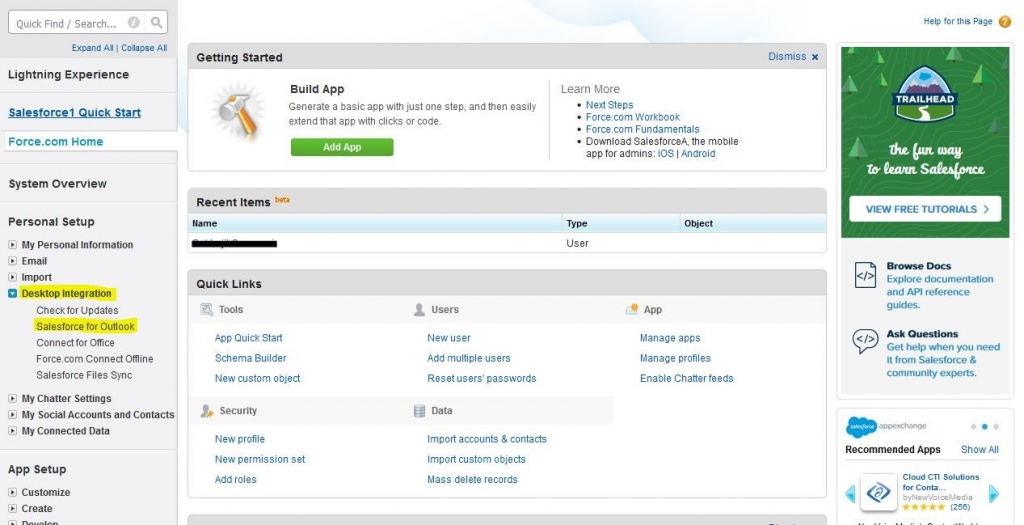
Step 5: Expand “Desktop Integration” option under “Personal Setup” Tab and click on “Salesforce for Outlook”
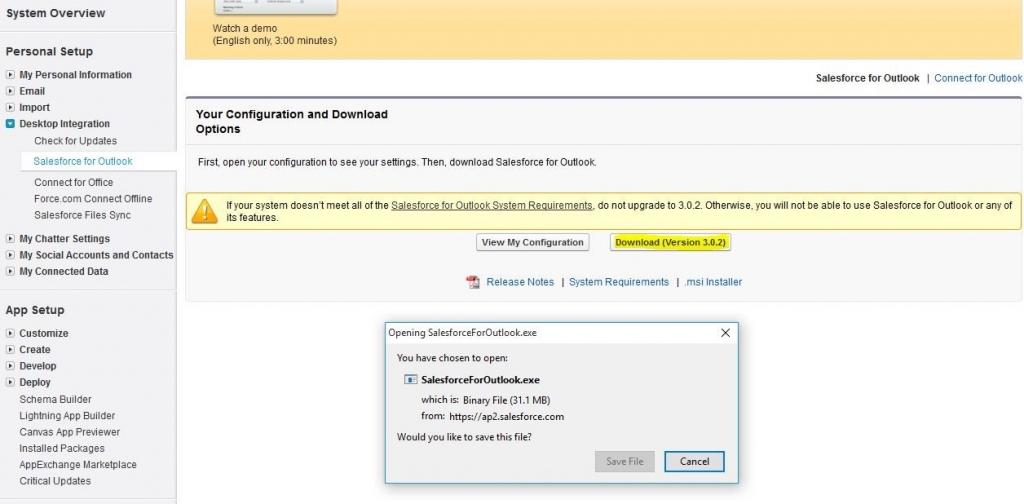
Step 6: In the new page that will open up click on “Download (Version 3.x.x)” button to download the setup file
Step 7: Click on the downloaded setup file to install the APP. If any particular component is required for the installation which might be missing in your system, then the installer will automatically download it during the process, just like in this case “Visual C++ 2010 ” was missing.

Step 8: After downloading the prerequisites, the installer will automatically install them and will prompt you to proceed with the install process. Complete the entire installation process

Step 9: Click on “Finish” and start your Microsoft Outlook App. You will receive a security certificate warning. Install it and proceed. You will also receive another security certificate warning, ignore it and proceed
 Step 10: A new pop up screen will appear where you will have to provide your Salesforce login credentials. Enter details to connect.
Congratulations!!! You have successfully connected your Salesforce account with your Microsoft Outlook.


