This article is for the e-commerce merchants who at the moment are jaded with their current hosting. You may have various reasons for this move but whatever your reasons are, I believe those have reached the peak for you to leap.
Now the question is how will you do it? I am here to provide you with a solution to make it easy and smooth for you. Let’s get started!
Back-up the Database:
This is the most vital step you are taking, so don’t just ensure but double ensure your data and file system backup. So once you have your backup ready, do test it once so that you can restore from your backup. Once all these steps are done and confirmed, sign or register with your new hosting provider.
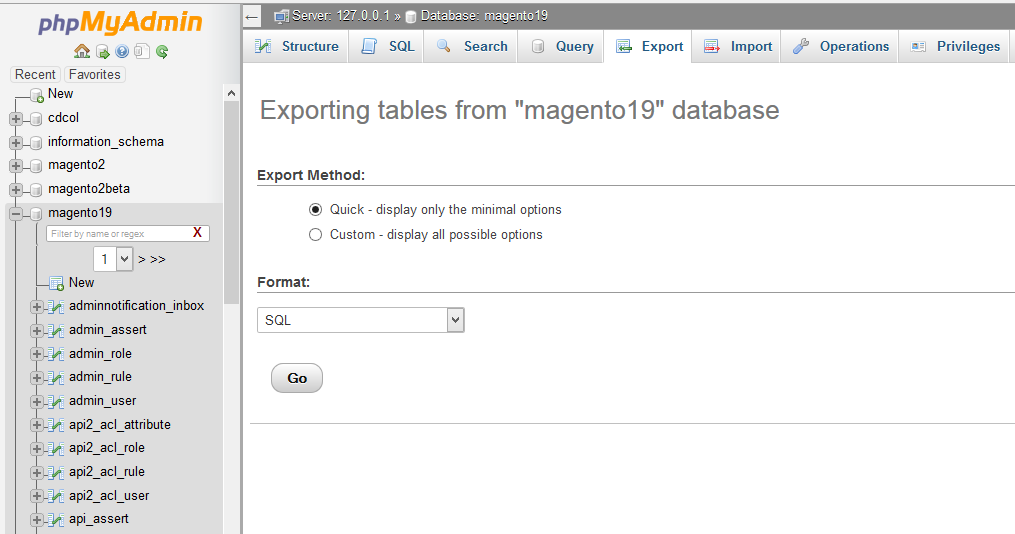
If the sever has ‘phpmyadmin’ then you can give it a miss in the command line. Now navigate to ‘phpmyadmin’, choose your Magento database and click the ‘export’ tab. Select appropriate file format and click on go.

In case you don’t have ‘phpmyadmin’, you will have to type the same format. Now, get the shell access and follow the subsequent process stating your host name, username, database name and make sure you choose a file name for the backup.
mysqldump -h HOSTNAME -u USERNAME -p DATABASENAME > BACKUPFILE.sql
Transfer the file system of Magento:
Let me warn you that this process might take a while unless you have a small store with numbered products.
Do you have FTP access? If yes, you can start copying the files to other locations. If not, utilize the Magento features, go to Magento admin → system → tools→ backups and just run a system backup.

In case you are comfortable with the command line try:
‘scp -r user@host:/path/to/site /local/machine/path’
The entire site will get copied to your local machine now. I am afraid this might not be feasible if you have a large site. In the past I have witnessed a site taking 36 hours to copy via scp which got reduced to 2 hours while holding the backup on the same server. If you want it this way, simply log in through ‘ssh’ and use ‘cp (copy)’ along with a ‘recursive flag (-R)’ to copy to another location in the same server. Though this is a faster option unless you are moving the hosting, you will have to follow the turtle race. And don’t forget to grab your beverage!
The move:
You are now ready to move your site to the new hosting.
Get your ‘filesystem’ and put it in place. Now this is a paddle back scenario, you will be repeating the same process just reverse the backup process following the previous steps. Now move the file in the document root, ‘/var/www/vhosts/sitename/httpdocs’ unless you have a different configuration.
However, if you find this complicated just plant a simple html file in the document root first and check if you can browse through it.
P.S. you will have to use your IP server because as of now you haven’t moved the domain name.
Now simply click ‘app/etc/local.xml’ to enter the right database details under “resources” section:-
1
Add table prefixes (if any) to <table_prefix> tag.
Add correct database credentials and don’t forget to save it.
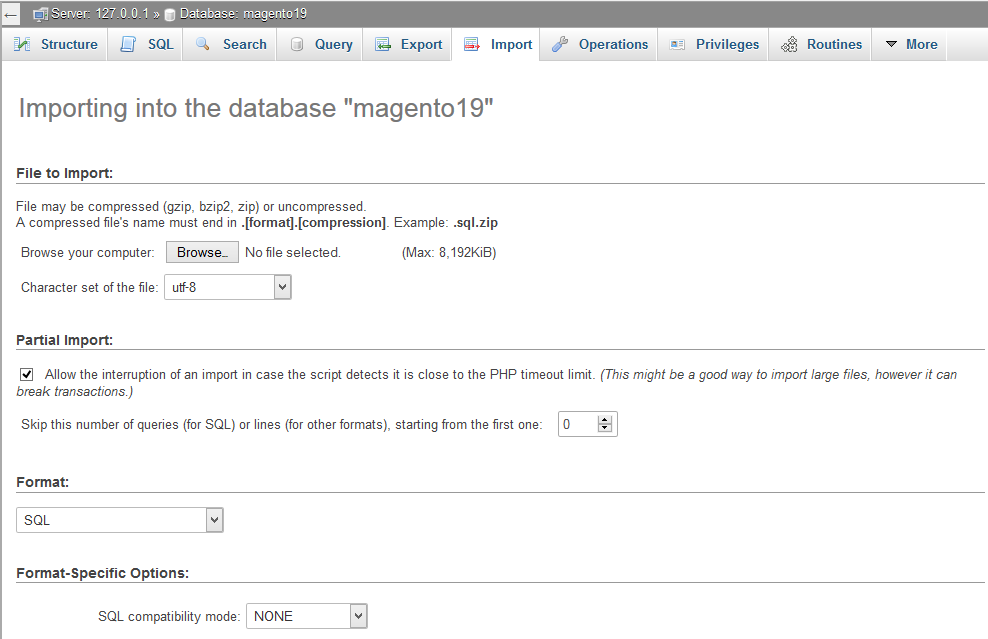
After this, the database will pop-up in the right place. As of now the ‘filesystem’ steps will be the reverse of the previous ones. You can either import via ‘phpmyadmin’ or the command line.
mysql -h HOSTNAME -u USERNAME -p DATABASENAME < BACKUPFILE.sql
Import the mysql dump file (you just saved in the above steps) into an empty database and check if it is set in the plan.

In case you get stuck, try Magento Database Repair Tool.
Now clear /var/cache & /var/sessions and we are done for the next step. After this only the domain name is left to be sorted.
The Domain name:
If you are looking for a new domain name, you need to change the reference to the previous one in the appropriate tables.
Select the ‘core_config_data’ table and by ‘path’ put the new URL in the ‘value’ field of the ‘web/unsecure/base_url’ along with ‘web/secure/base_url’.
Now if you want to continue the domain name, you will have to point the DNS system to your new location. To establish this log in your domain name provider and also the head management area, ‘edit’ the record to the IP of your new hosting provider.
Again, this process might take around 24 hours so it is advisable to put your old website into maintenance mode (unless you want to start the DNS move now). It means anyone who has got the DNS update can place an order at the new location and the order will get stopped for the old location.
Finally, I believe you have been successful in moving your Magento to the new hosting provider! If not you can comment for reference.


